
Principals and vice principals can create and manage their Professional Practice Projects at any time using the Principal Dashboard or the Professional Practice sub menu.
Principals and vice principals can both follow the instructions in this guide to create or edit their projects and artifacts. Please note that principals may create up to 3 projects and vice principals may create 1 project.
To access projects from the main menu, log in the Evaluations Hub, hover your cursor over the 'Professional Practice' main menu item, select 'My Projects', and click on the desired project. This is shown below. Note that "My Projects" will be displayed as "My Initiatives" for vice principals.

To access your Professional Practice Project from the Principal Dashboard, log into the Evaluations Hub, hover your cursor over the 'Dashboard' main menu item, and click 'Principal Dashboard'. Once in the Principal Dashboard, click on the icon for "Project 1", "Project 2" or "Project 3" directly underneath your school name. This is shown below.
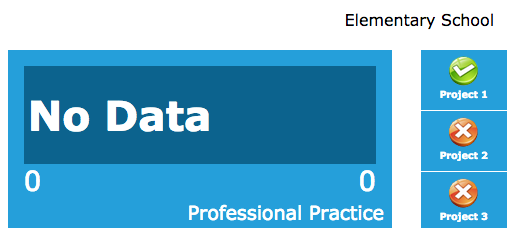
In the image above, the Principal has started "Project 1" but has not yet started "Project 2" or "Project 3".
The red x icon indicates that the Project has not yet been started or created. The green checkmark icon indicates an existing or completed Project. To create a new Project click the red x icon and the Professional Practice Project page will display, as shown below.

Enter a Title, Standard, and Description and click 'Create' to create the new Project. PLEASE NOTE: The Description field shown above will only allow 250 characters of text. Use the project narrative field (displayed after clicking Create, as shown below) to enter narrative-style text that is longer than 250 characters.
After clicking 'Create', the page shown below will display. Enter the Project narrative into the field shown below and click 'Save' to proceed. Enter text directly into the field or paste in text from another application, such as MS Word
.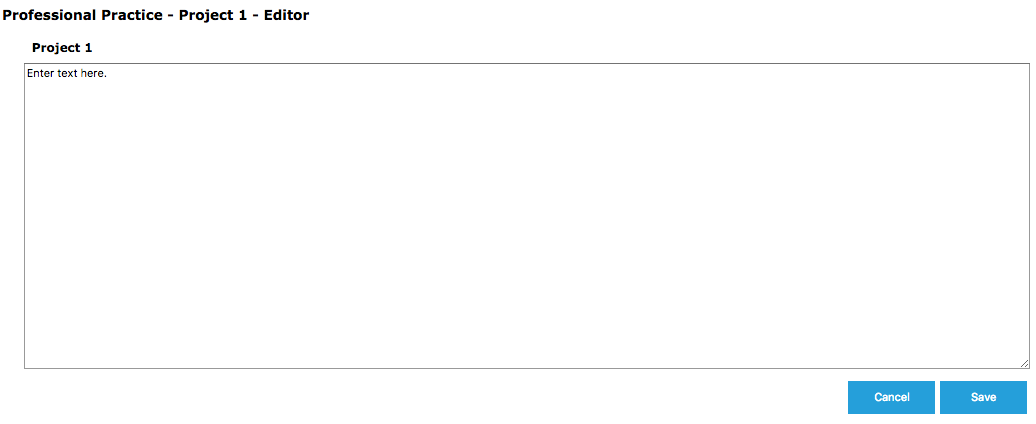
To edit the Project narrative, navigate to the Project of your choice and click the edit icon in the row where the Project is listed, this is shown below. The page will appear as shown above, edit the narrative as needed and click 'Save' to save all changes.

To add a new artifact, navigate to the Project page of your choice and use the "Add New Artifact" fields, as shown below. Select a file, enter a description for the artifact, and click 'Upload' to add the artifact. Artifacts may be up to 500MB each, any file type, and you may upload as many artifacts as needed.

After the artifact has been uploaded it will display in the Narrative and Artifacts list on the Project page, as shown below. Click the delete icon in the artifact's row (to the left of the Date column) to delete the artifact.

Comments
0 comments
Article is closed for comments.